JAMStack with Hugo and NetlifyCMS - Part 2
Introduction
In Part 1, we have created a simple website with hugo.
Now on this part 2, we are going to add netlifyCMS locally and then make our website go live on the internet.
This is the github repository for this site: https://github.com/tranvnb/hugo-and-netlifycms
Set up local NetlifyCMS
1. Create configuration files
Create a config.yml file at the top level directory of your website. This file will hold all the global configuration of this website and we’re going to put all the site configuration here.
my-site$ touch config.yml
For window
my-site> echo. > config.yml
Add this content to above file
    baseURL: /
    languageCode: "en-us"
    title: "My New Hugo Site"
2. Create admin page of NetlifyCMS
At this point, we haven’t have anything related to netlifyCMS yet.
To have an admin page using NetlifyCMS, create directory static/admin/ and 2 files in it:
    <!-- static/admin/index.html -->
    <html>
    <head>
        <meta charset="utf-8" />
        <meta name="viewport" content="width=device-width, initial-scale=1.0" />
        <title>Content Manager</title>
    </head>
    <body>
        <!-- NetlifyCMS -->
        <script src="https://unpkg.com/netlify-cms@^2.9.6/dist/netlify-cms.js"></script>
    </body>
    </html>
This file with the javascript file account for the graphical interface of the content management page.
    local_backend: true #Must be put on top, otherwise you have to login to Netlify service to use this admin tool
    backend:
    name: git-gateway
    branch: main

    media_folder: static/images
    public_folder: images
    collections:
    - name: globalConfig
        label: Global Site Config
        files:
        - name: config
            label: Global
            file: config.yml
            fields:
            - widget: string
                name: baseURL
                label: Base Url
                required: true
            - widget: string
                name: title
                label: Title of website
                required: true
Be aware the first line, without it, you can not access admin page unless you have to create a Netlify account and login through it.
Let me explain more about config file above
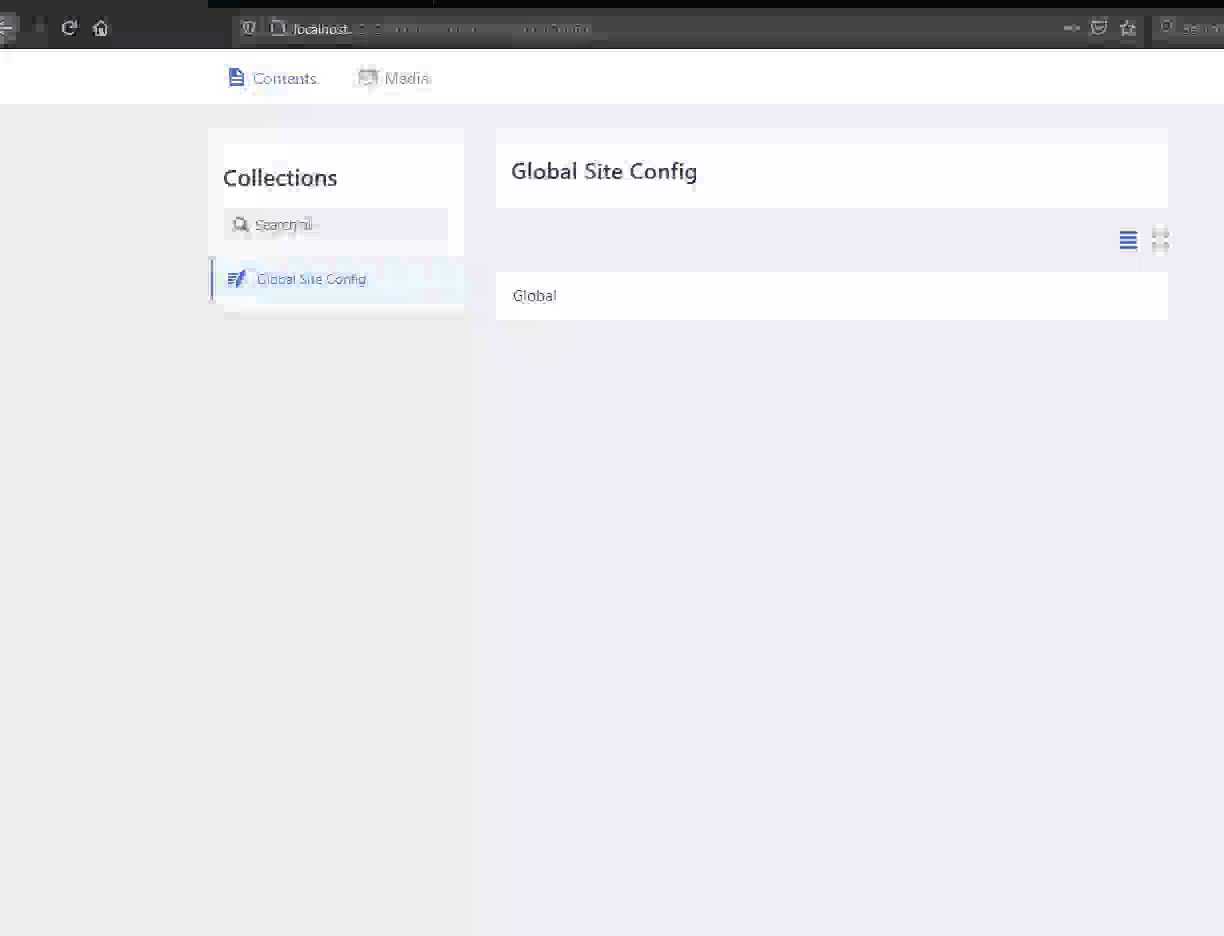
name: globalConfig: name and label show on admin page. You will get this by following screenshot.file: config.yml: point to our website config, which is located at the root lovel folder. All the changes will be save to it.fields: configuration fields ofconfig.ymlfilewidget: string: a widget (field type) holding the values. Please refer to Netlify Configuration for more information.
Start the local NetlifyCMS service
npx netlify-cms-proxy-server
And now, let see what we got
Try to change the title of website and publish, you will see the updates in your config.yml file.
Configuration to create a new post/blog using NetlifyCMS
Now move on the main part which is settings for creating a new blog.
Add content below to your static/admin/config.yml
Start the hugo service and refresh admin page
  - name: blogConfig
    label: My Blog
    create: true
    delete: true
    folder: content/blogs
    slug: '{{year}}-{{month}}-{{day}}_{{slug}}'
    fields:
      - widget: string
        name: title
        label: Title
        required: true
        hint: The title of the blog.
      - widget: date
        name: date
        label: Date
        required: true
      - widget: boolean
        name: draft
        label: Draft
        required: false
        default: true
      - widget: markdown
        name: body
        label: Content
        required: true
        hint: Page content
This config must be under files and the same level with name: config. You can check the full file on github: config.yml
folder: content/blogsfolder where new blogs are createdslug: '{{year}}-{{month}}-{{day}}_{{slug}}': format pattern of blog file name
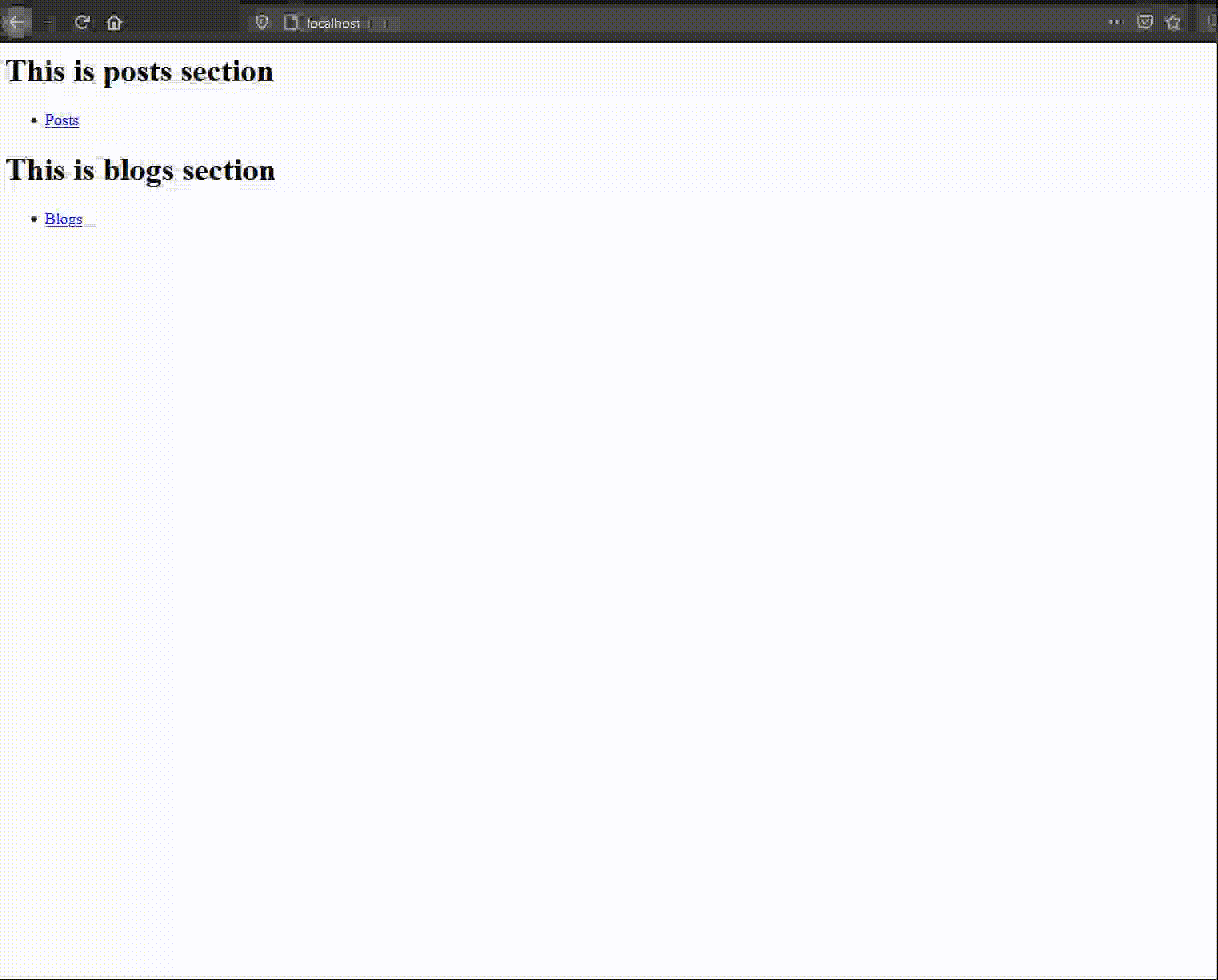
Refresh our page you will get the result
Deploy website to Netlify Service
NOTE: Assuming that you have already have github account and netlify account. Otherwise please refer to this github tutorial and netlify
1. Add website files to Github
NOTE: Remember to add netlify.toml configuration file following Hugo host on Netlify guidelines. This config file let netlify know how to build and deploy our website.
  $ git init
  $ git remote add origin [git@github.com:[your-account-name]/[your-repository-name].git]
  $ git add . # add all your files to local git repository
  $ git commit -m '[your comment]'
  $ git push origin # push all your changes to repository on Github service
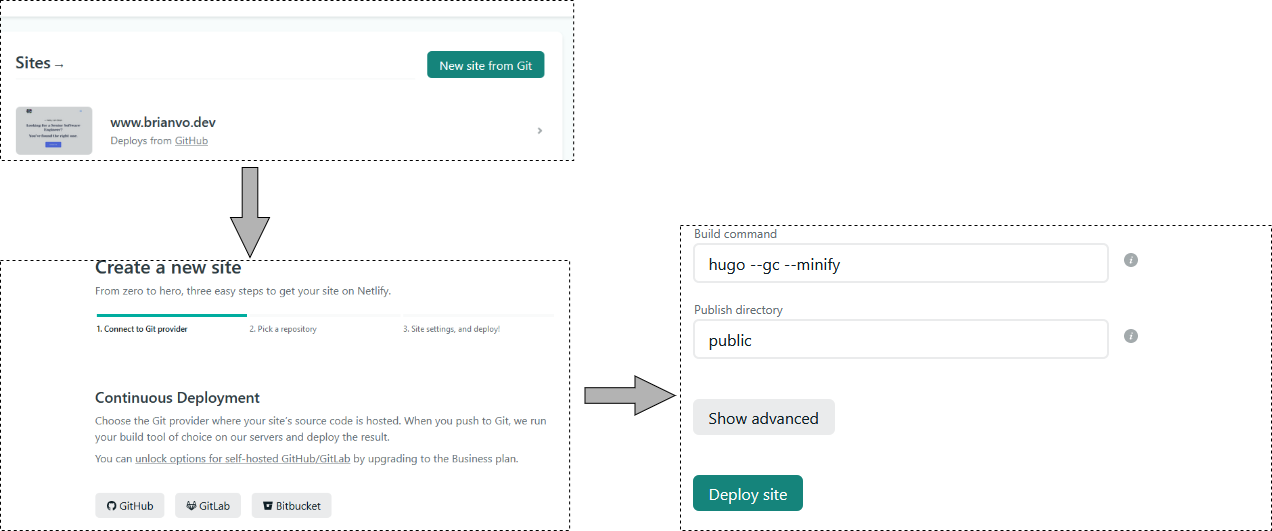
2. Create online website on Netlify service
Open the main page of Netlify, choose New site from Git, choose Github, sign in to your github account, and final step is choosing Deploy site
3. Login to Netlify CMS
NetlifyCMs provides a widget helping we login to online admin page and we can manage our website anywhere anytime.
Enable Netlify Identity: https://docs.netlify.com/visitor-access/identity/
Add a script to static/admin/index.html file
<script type="text/javascript" src="https://identity.netlify.com/v1/netlify-identity-widget.js"></script>
Summary
Now you have a picture of how to build and deploy a simple static website by yourself using Hugo and Netlify.
If you want to build a more complex website, please refer to Hugo document and for sure a simple knowledge about Golang.